
A recursive workflow is a workflow that can schedule itself to run in the future. You can think of it as a workflow that can and will run in a loop until terminated.
A recursive workflow is a "Do X While Y" loop, where both the parameters can be dynamic.
Recursive workflows need to be triggered from the front end (a page), but they run in the back end (backend workflow). They will continue to run until the exit condition is not met. They help you work on a large list, one item at a time.
Example use cases
- Sending an email to all app users that are members of a group.
- Marking 200 user accounts as inactive.
- Create new database records
In any scenario where you want to make changes, create new records or trigger an action in bulk, you can use recursive workflow.
Benefits of recursive workflows
Why would you use recursive workflows when you have the "Make changes to a list" or "Copy a list" action?
The reason is that your Bubble app may time out if the list you want to work with is large. Some records may be skipped, or the entire workflow may be terminated. If you wish to continue from the point of failure, you won't be able to find the workflow's point of failure.
Another advantage of recursive workflows is that you can control the exit condition. This lets you create complex workflows and have complete control.
And finally, you can also start another recursive workflow from the same workflow.
Enabling recursive workflows
Recursive workflows are available for all paid plans on Bubble. However, they need to be enabled.
Go to Settings > API > Enable Workflow API and backend workflows to enable them.
How to set up a recursive workflow
To better understand recursive workflows, let's examine two examples.
In the first example, we'll send emails to all our app users. While in the second example, we will accept a list of names using an input field and create records in the 'Ships' using those names. Each ship will have a name from the initial list of names.
Sending an email to all our app users
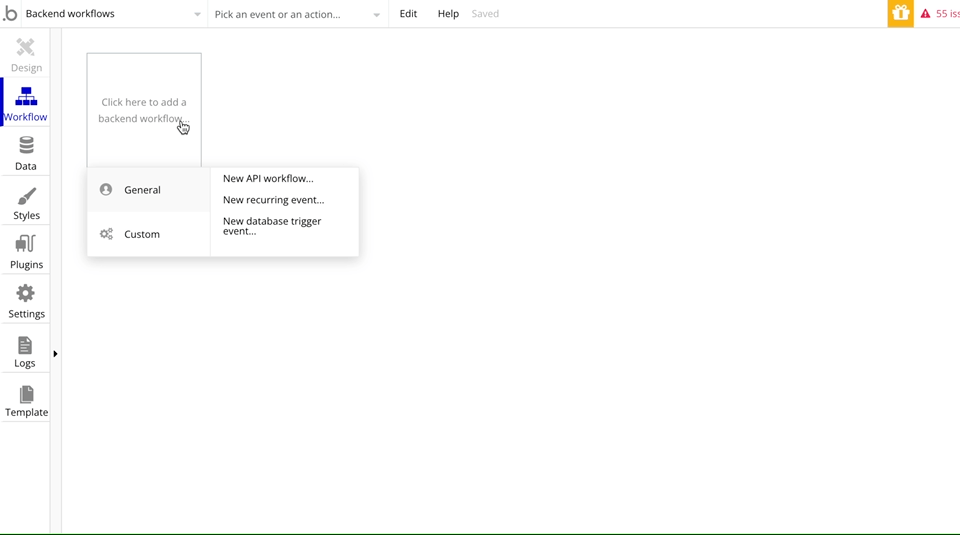
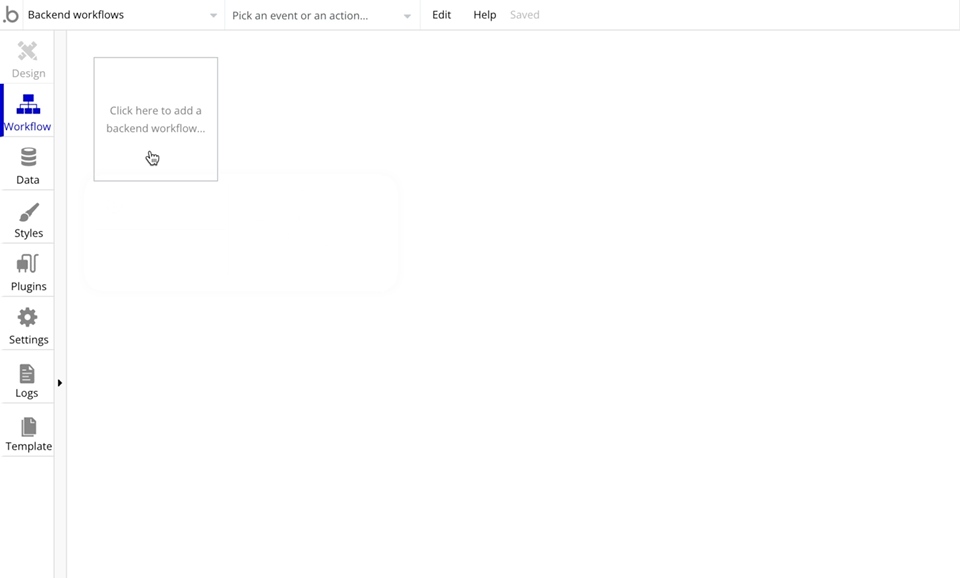
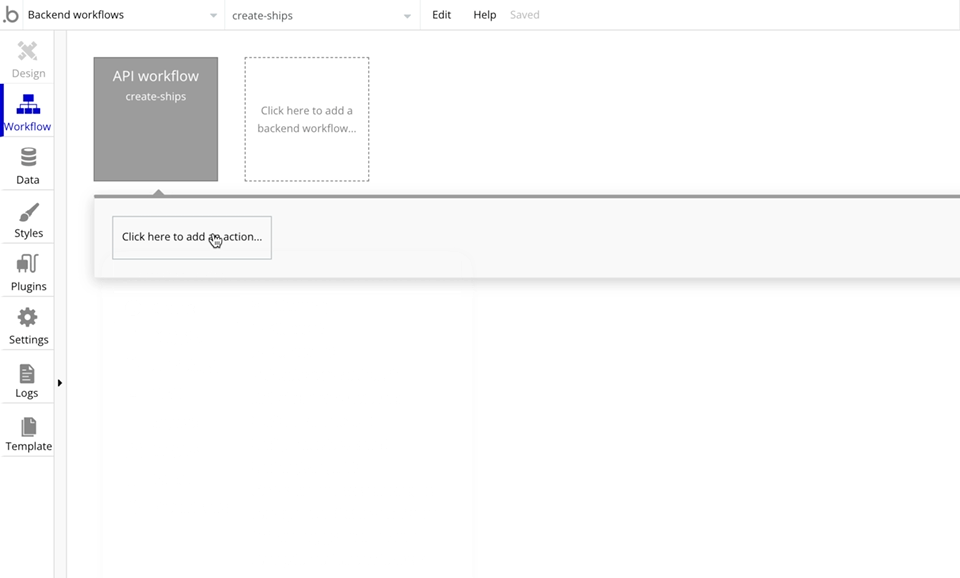
We'll start by creating a new API workflow. We need to give a name to this workflow.
After naming our workflow, we can set its parameters.
The list that we'll be working on will be a list of Users. So the first parameter that we need to create for this workflow is Users.
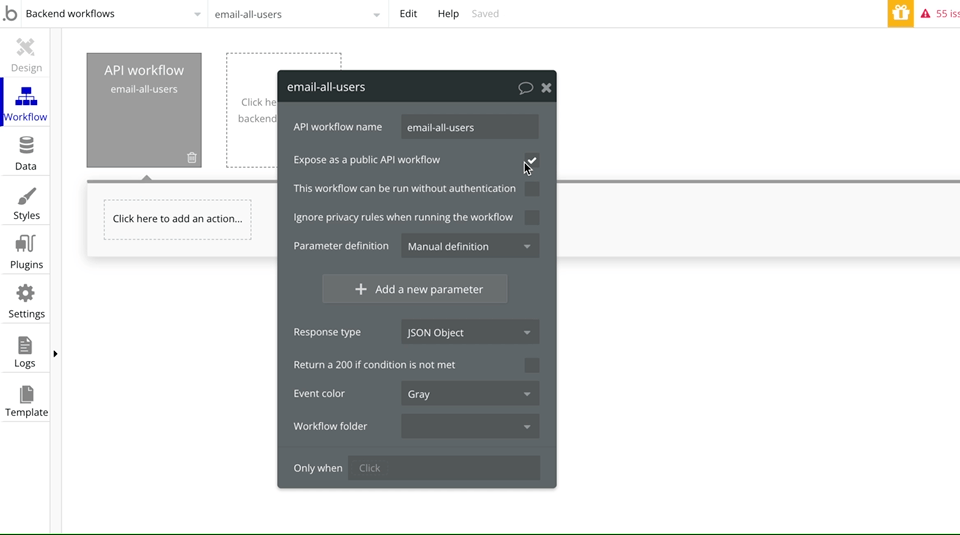
We also need an 'iteration' parameter of the type number. This parameter helps us control when the recursive workflow ends. It will store how many iterations of this workflow have been run.
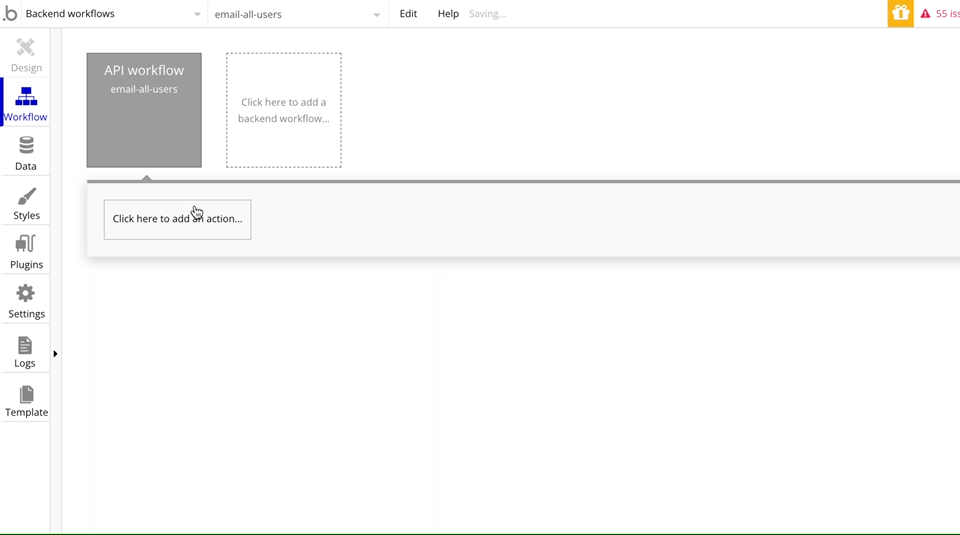
Once the parameters have been defined, we can begin creating the actions.
We need to add the 'Send email' action to send the email. Now we'll work on the list of Users one by one.
You would typically put one email address. But we need to email a list of Users.
We'll pick a User from the list, email them, then pick the next User and repeat the process.
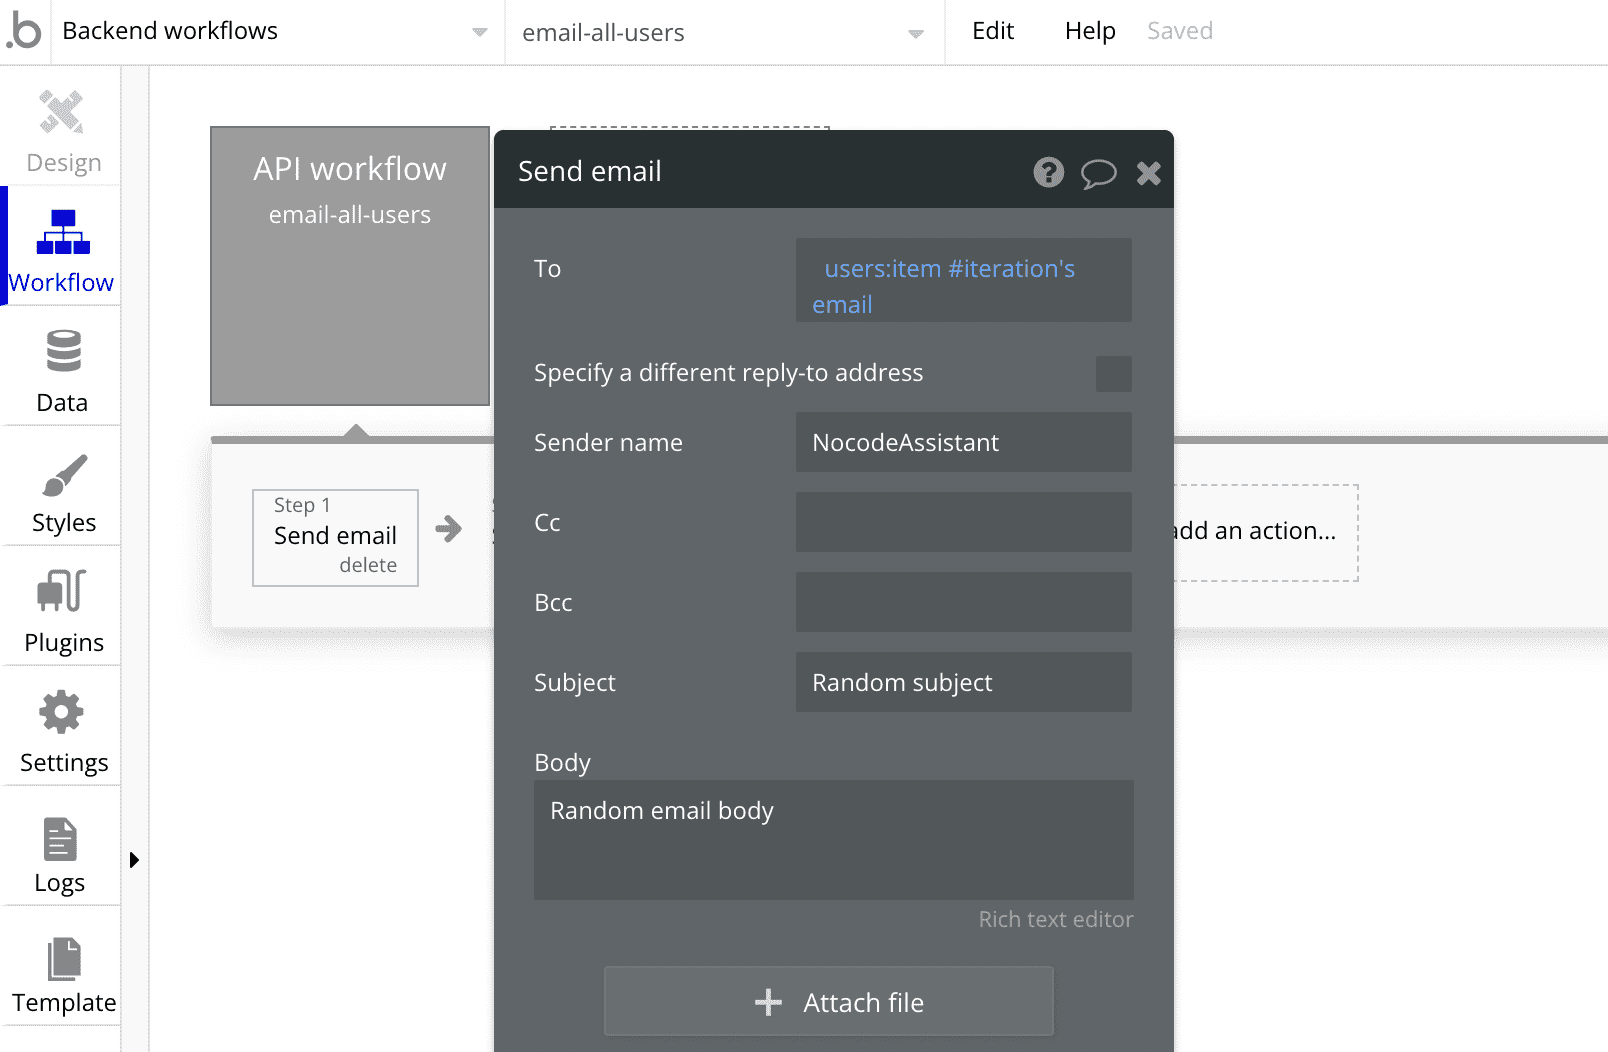
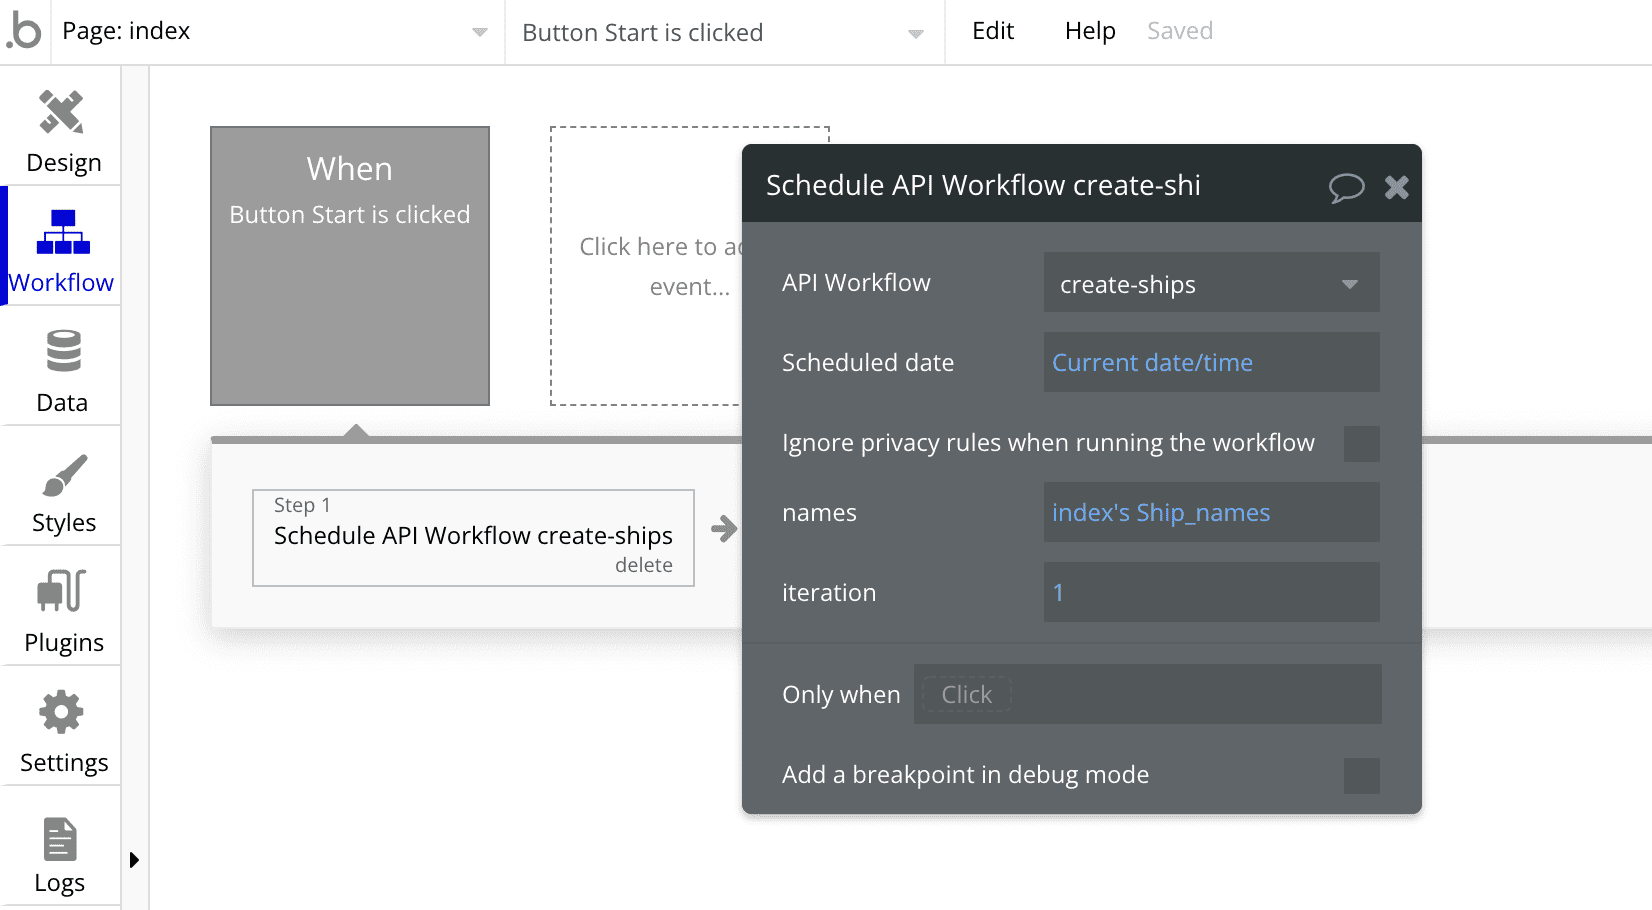
From the list of users, we'll pick the User number iteration.
In the first iteration, User number 1 will be picked. In the next loop, the iteration number will be increased to 2, so User number 2 will be selected.
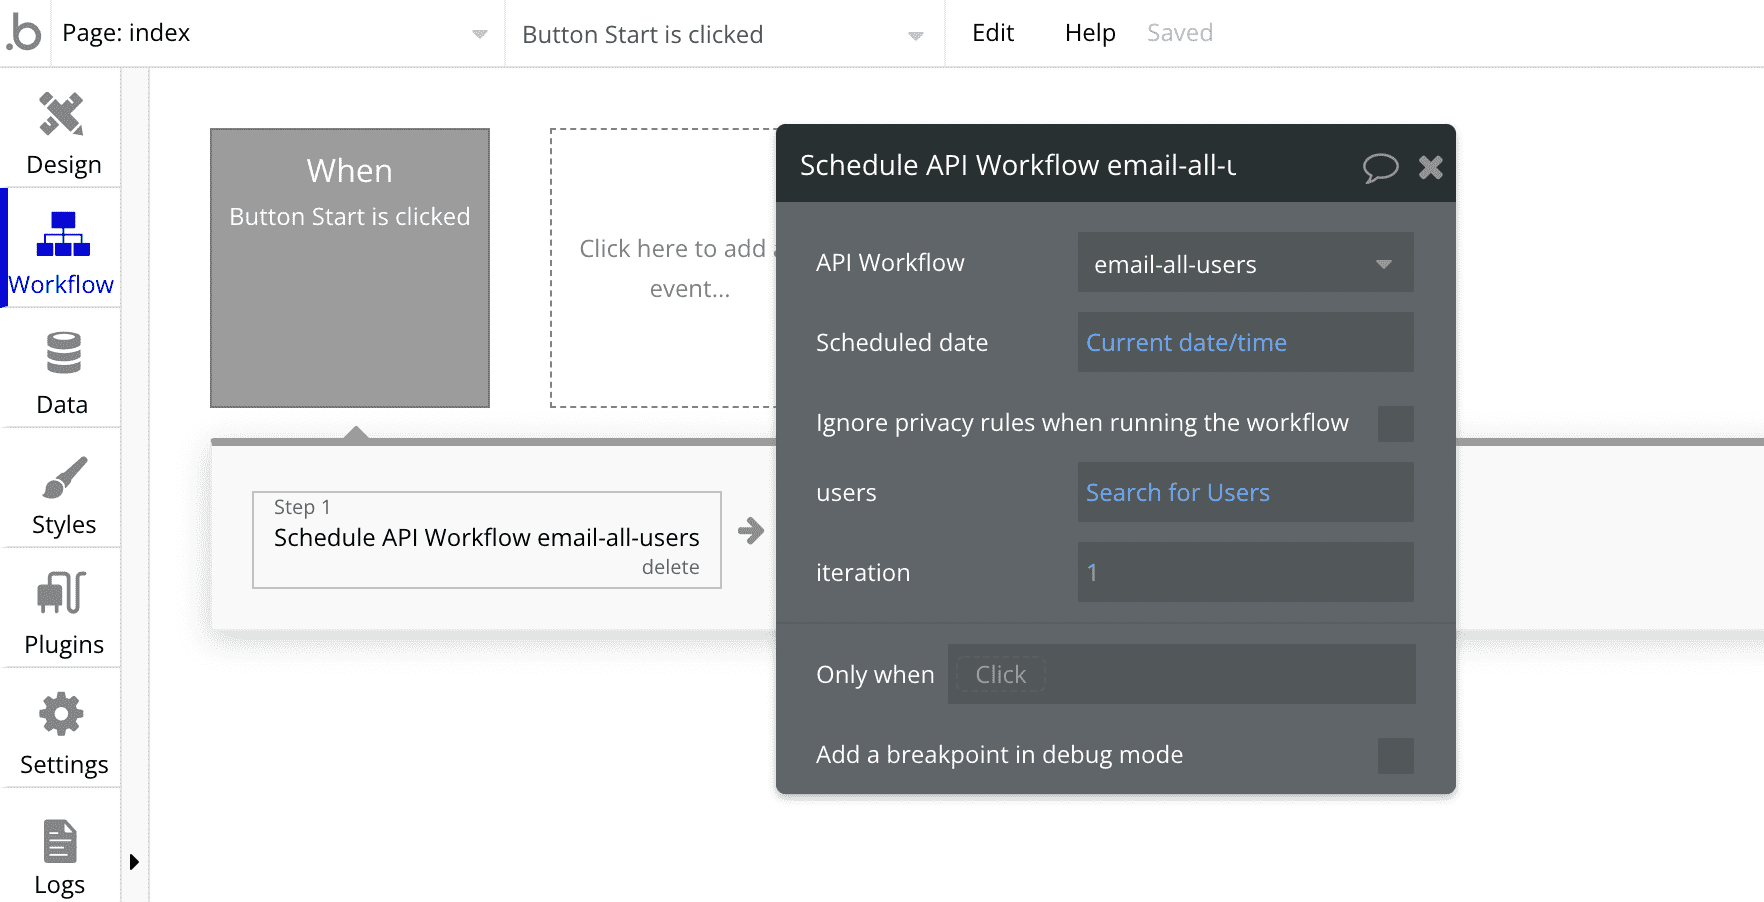
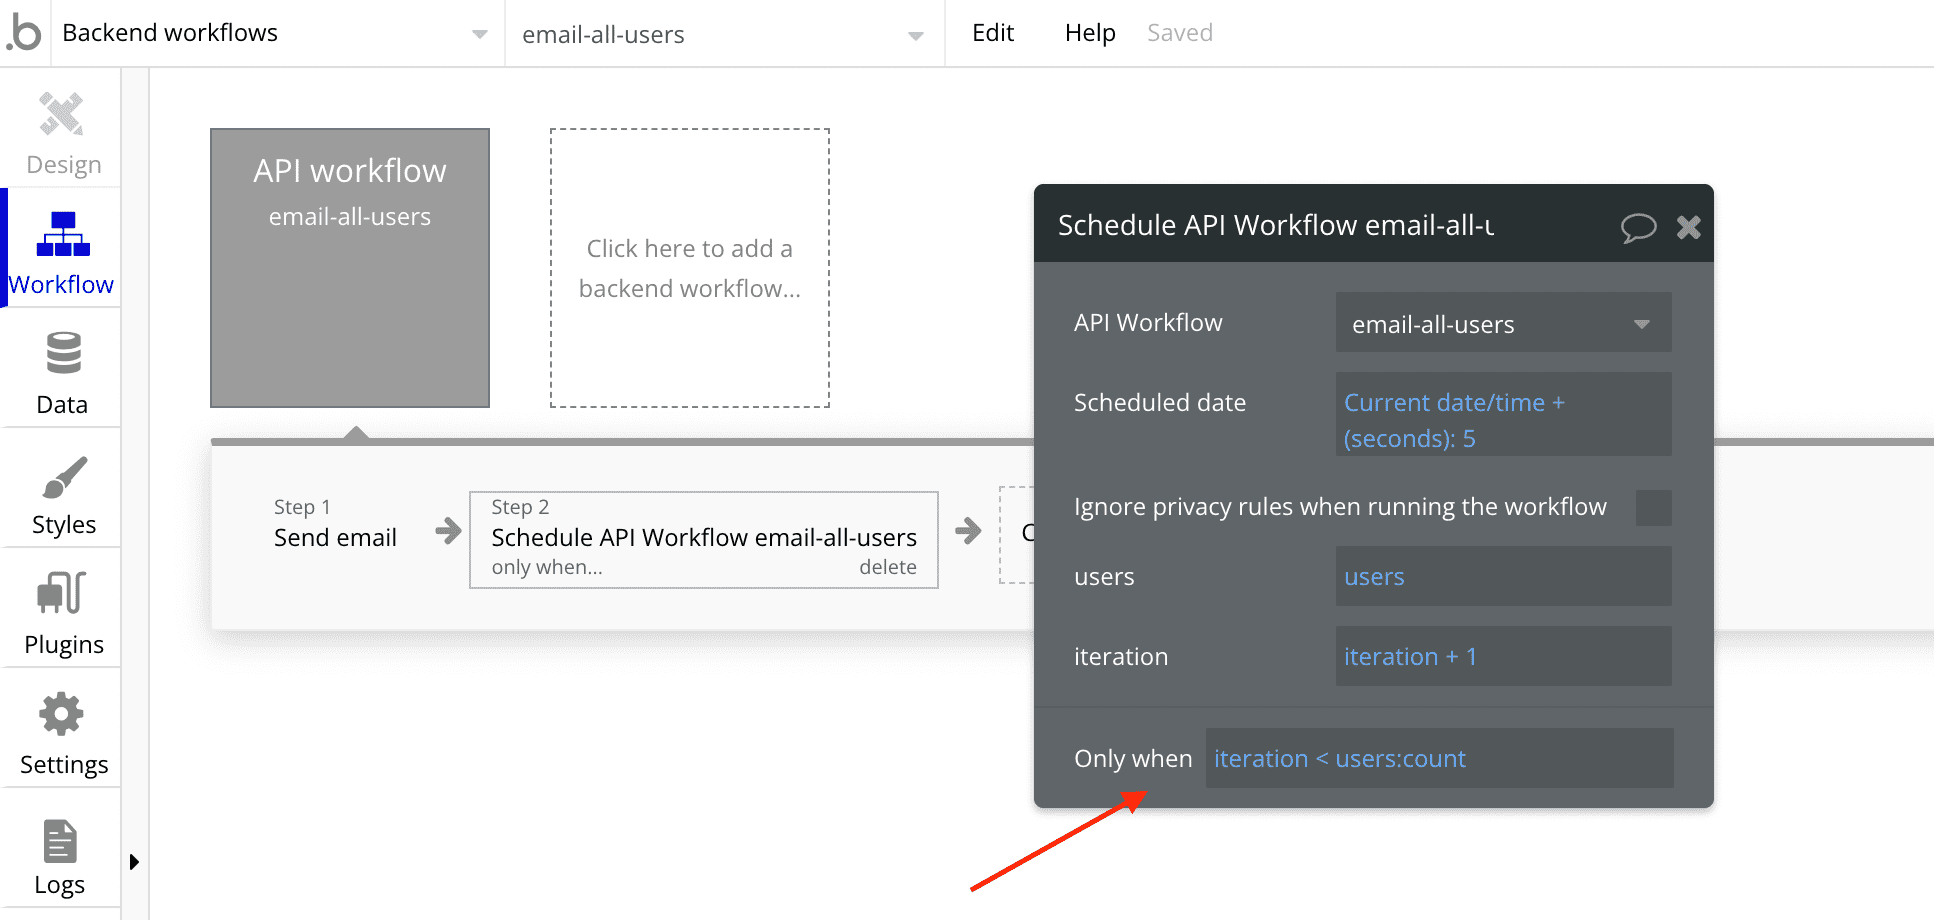
The next step is to schedule the same workflow for a future time. We will schedule the same workflow to run 5 seconds in future. Give a small gap between each iteration.
We will pass the entire list of Users to the workflow and increase the 'iteration' parameter by 1.
You now have a recursive workflow that will schedule itself!
You can trigger this workflow from anywhere in your app and send it a list of Users. Ensure that the 'iteration' value is set as 1 when you start it.
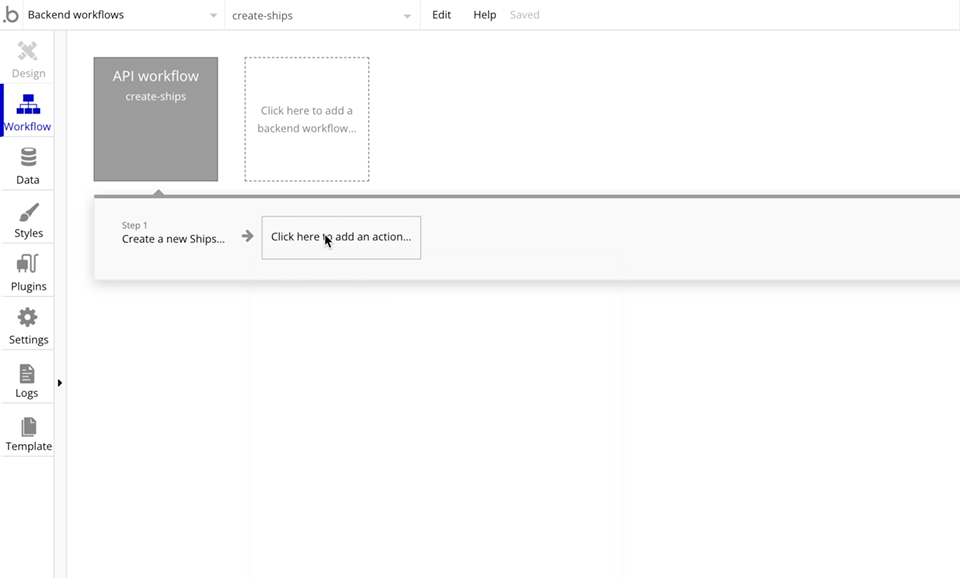
Creating new records using a recursive workflow
We have an input field where a user can type a name and add the name to a custom state. The custom state stores a list of names.
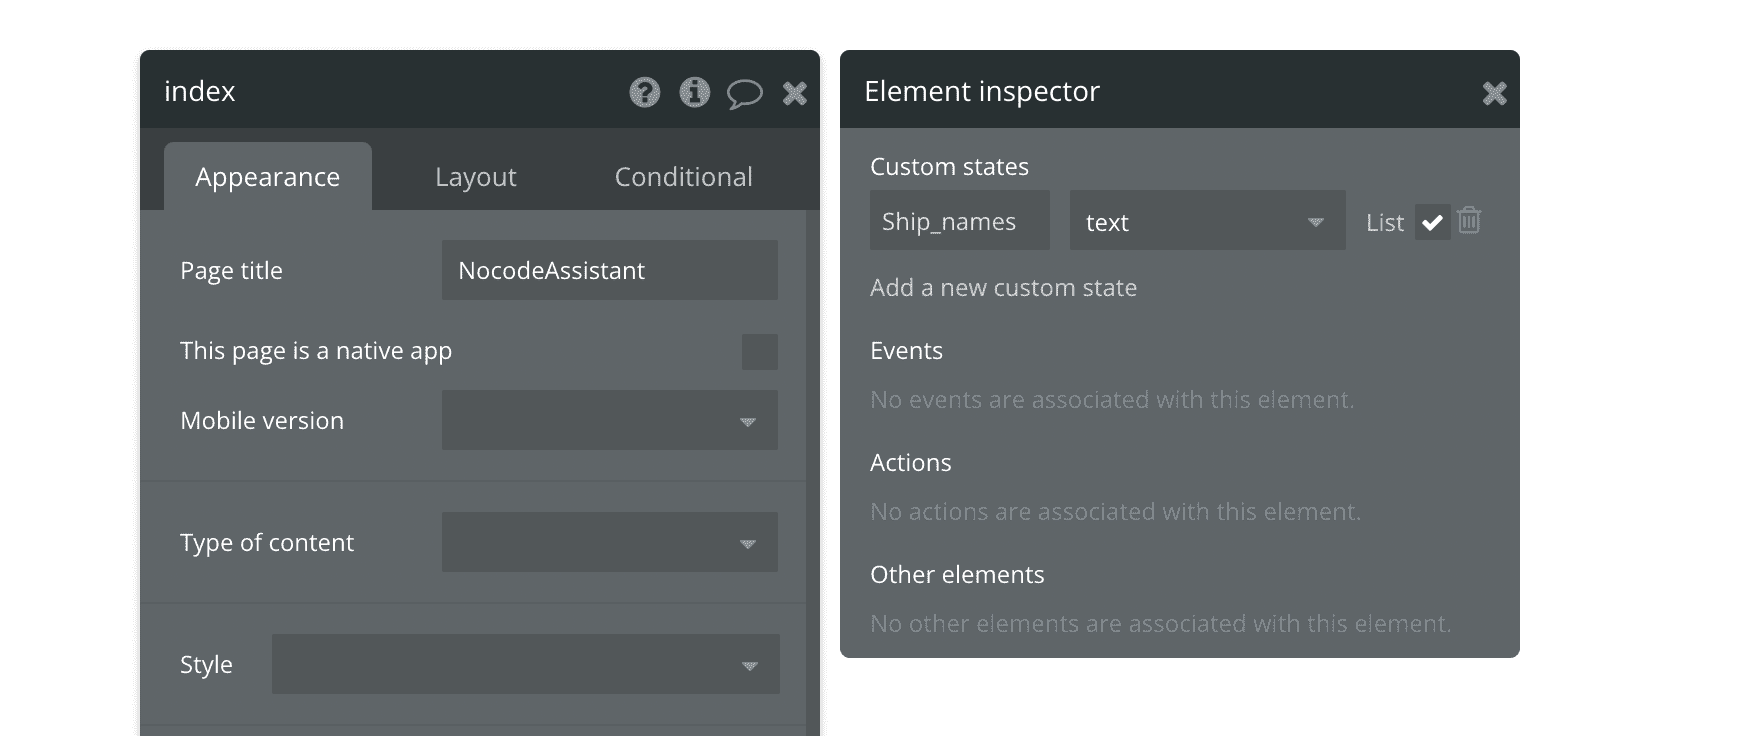
We will pass the custom state value to a recursive workflow and create a new record in the 'Ships' data type.

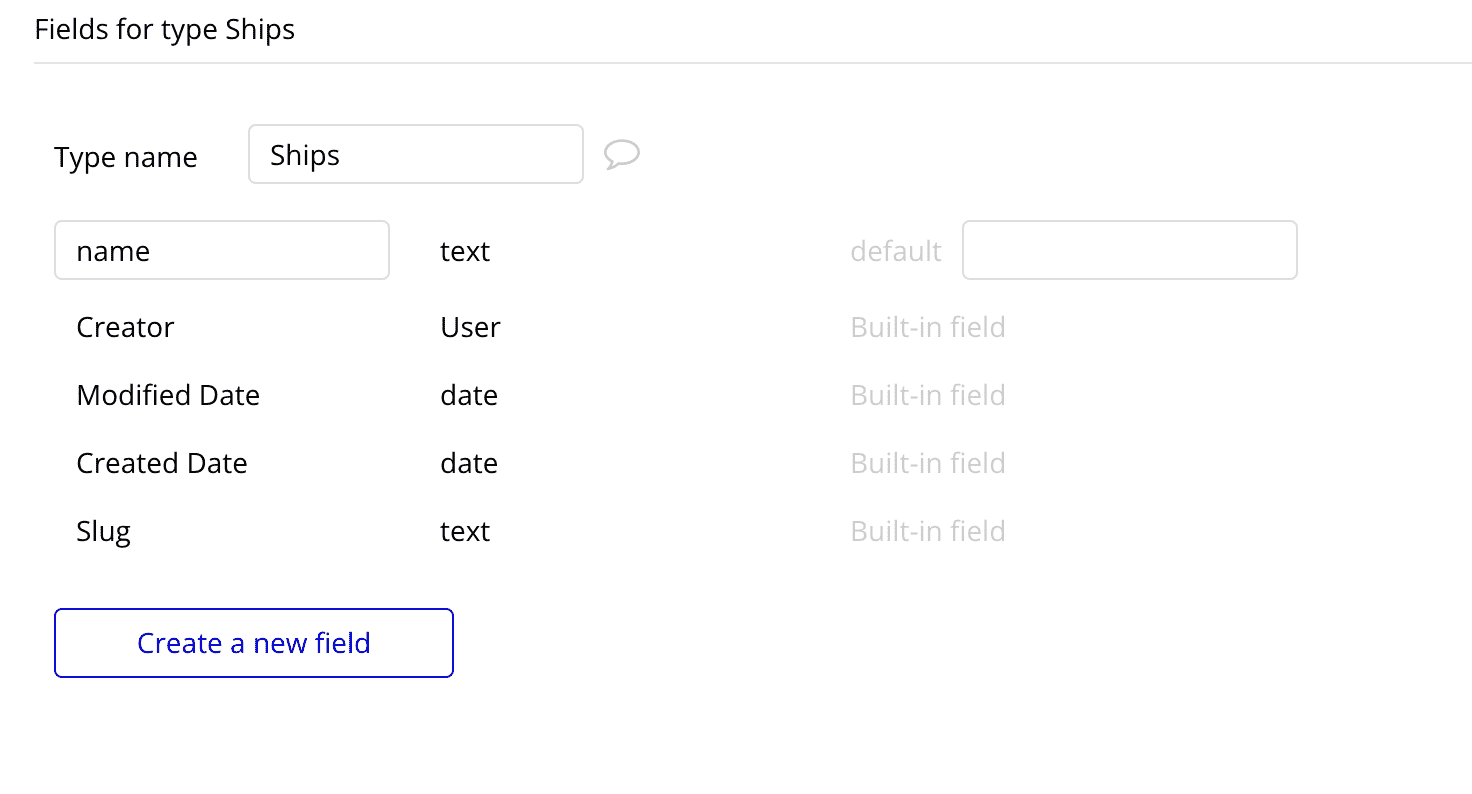
We'll again begin by creating a new API workflow and defining the parameters. The parameters will be a list of text and 'iteration'. The role of the 'iteration' parameter is the same as explained above.
We'll pick a name from the list, create a new record, then pick the next name and repeat the process.
From the list of names, we'll pick the name number iteration.
In the first iteration, name number 1 will be picked. In the next loop, the iteration number will be increased to 2, so the name number 2 will be selected.
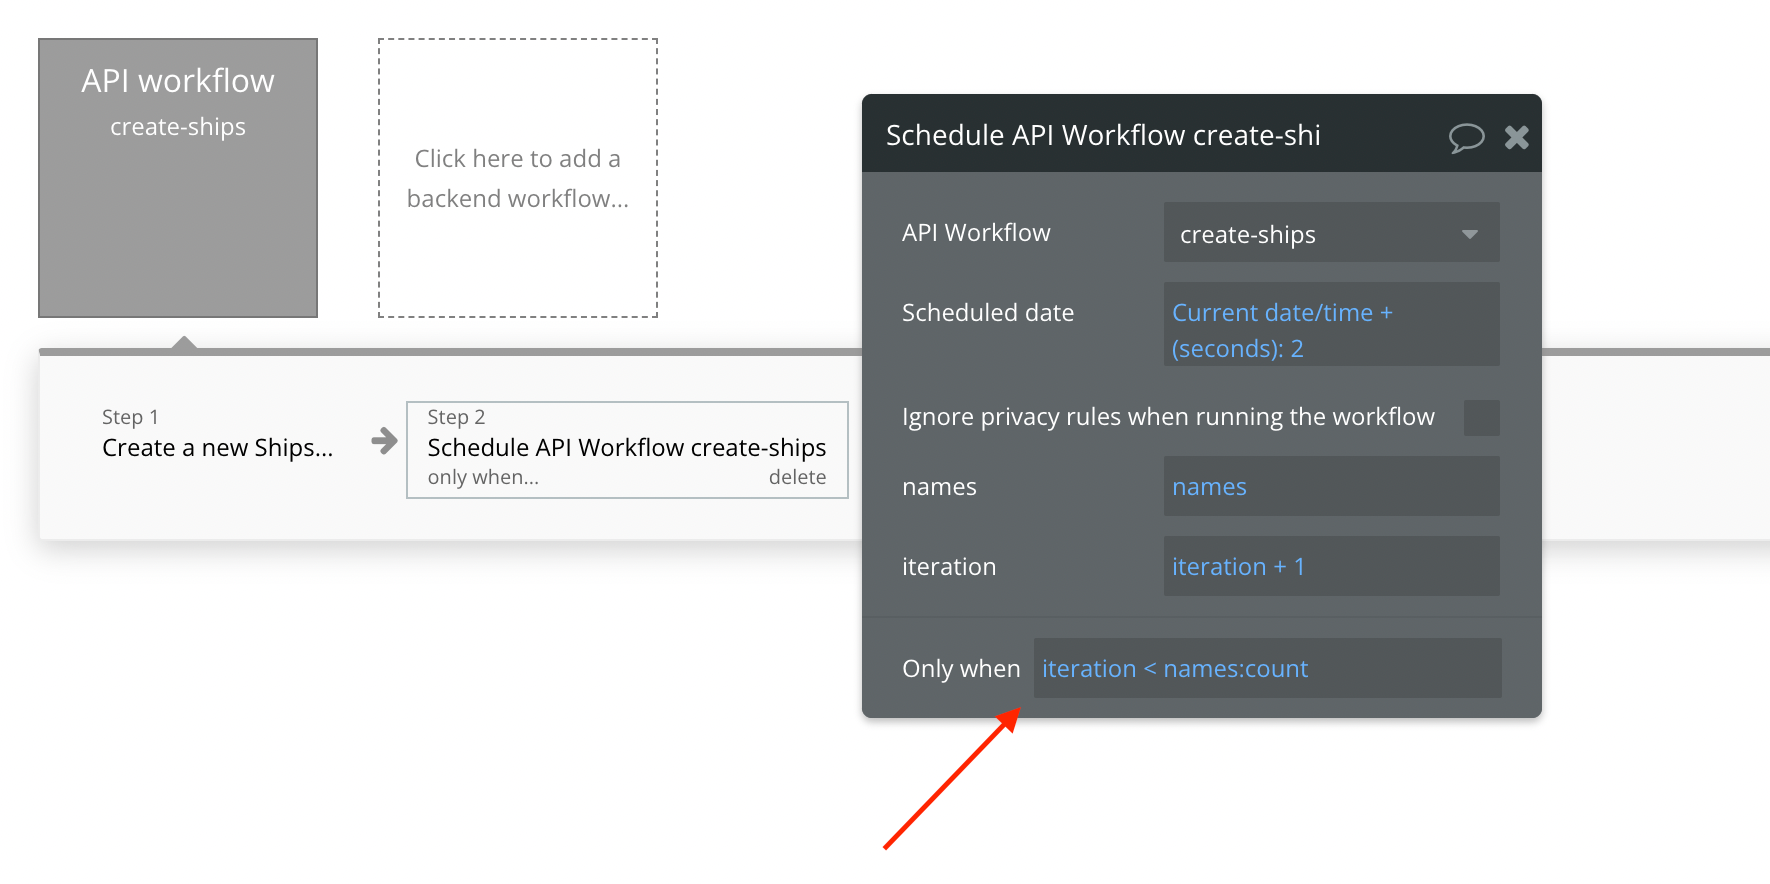
The next step is to schedule the same workflow for a future time. We will schedule the same workflow to run 2 seconds in future. Give a small gap between each iteration.
We will pass the entire list of names to the workflow and increase the 'iteration' parameter by 1.
Your recursive workflow can be triggered from anywhere in the app.
Exit conditions in recursive workflows
The recursive workflows we just set up have one big flaw. They will run indefinitely as they lack an exit condition!
An exit condition will terminate a recursive workflow when the condition is met.
The 'iteration' parameter will help us create the exit condition.
In the first example, we want to stop the recursive workflow when all the users have been emailed. The exit condition can be that we will not schedule it further when the iteration is equal to the no of users.
We will add an Only when condition to the workflow so that it will be scheduled only if the iteration is less than the count of users.
In the second example, we want to stop the recursive workflow when all the names have been used to create a new record. The exit condition can be that we will not schedule it further when the iteration is equal to the list size.
We will add an Only when condition to the workflow so that it will be scheduled only if the iteration is less than the count of names.
Cancelling a recursive workflow
You can cancel an upcoming recursive workflow if there is enough time.
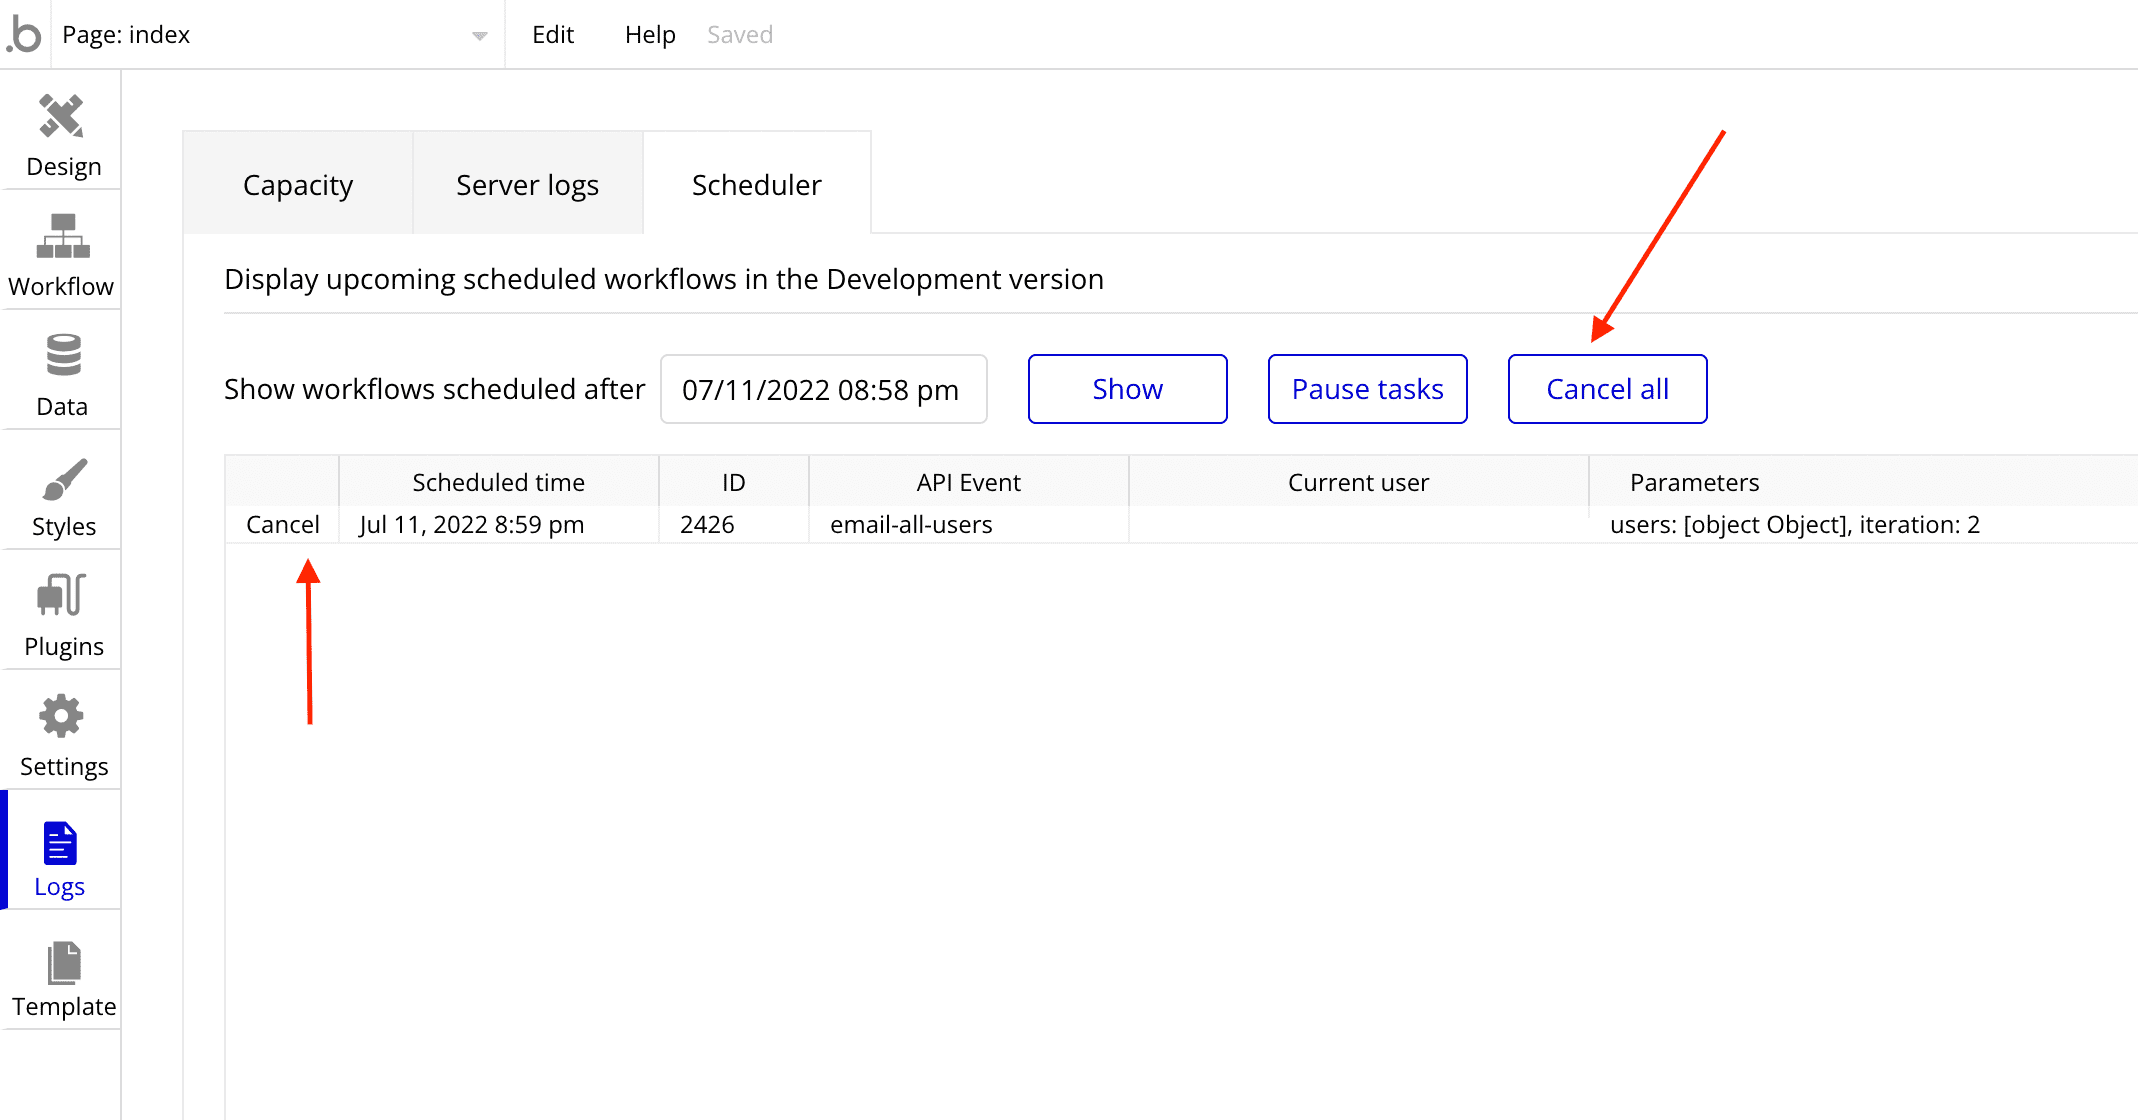
To manually cancel a recursive workflow, go to your Bubble app's Scheduler section under the Logs tab. Click Show.
All the upcoming workflows will be listed. Next to each workflow is a 'Cancel' button. You can cancel all the workflows that you want. You can also click 'Cancel all' to cancel all the upcoming workflows.

If you need some help with your Bubble app or a team of Bubble developers to build a Bubble app for you, reach out to me at [email protected]. You can also follow me on Twitter.

Join the conversation.